TURKISH GET-UPS
I want to start this off by saying that I am not a professional “turkish get-upper”. People attend clinics and seminars in order to perfect their TGU’s (Turkish Get-ups). Even then, it takes a long time to perfect this lift, but you have to start somewhere.
In this week’s Wild Skills, we are going to give you the information you need to get started on putting Turkish Get-Ups into your workout repertoire. The TGU is an amazing exercise that has so many benefits aside from increasing overall stability, awareness, balance and coordination. In fact, legend has it that when old-time strongmen were asked to take on an apprentice, they would often send the applicant away, telling them not to return until they could perform one Turkish Get-up using a 100-pound weight. If they could achieve this feat, then the real training would begin.
Benefits of the Turkish Get-Up | Dr. Joseph Mercola
| Promotes upper body stability | Promotes lower body stability | Promotes cross lateralization (getting right side of brain to work with left side) |
| Ties the right arm to the left leg, and left arm to the right leg | Gets the upper and lower extremities working reciprocally | Promotes reflexive stability of the trunk and extremities |
| Stimulates the vestibular system, which contributes to balance | Stimulates the visual system, which contributes to balance | Stimulates the proprioception system, which contributes to balance |
| Develops a front/back weight shift | Develops upper body strength, trunks strength, and hip strength | Promotes spatial awareness |
| Closed and open chain shoulder stability | Thoracic extension and rotation | Hip and leg mobility and active flexibility |
| Both rotary and linear stability | Stability in two different leg patterns – lunge stance and squat stance | Single leg hip stability during the initial roll to press and during the bridge |
As you can see, this is an amazing move that you NEED to be supplementing into your weekly regimen. The “yin” nature of this movement where you are slow and controlled contrasts to the “yang” of other lifting movements that we do on a daily basis. Now let’s figure out the steps to better perform this exercise.
STEPS
1. Cradle And Grip The Kettlebell
- Place the kettlebell next to the shoulder on the side you’re working.
- Roll to your side and cradle the kettlebell with both hands. The working hand grips the kettlebell, and the opposite hand covers it.
- Roll onto your back and place the kettlebell on your stomach.
- Move the bell so the arm is perpendicular to the floor, either using one hand or both. Some people choose to add a single-arm press, but it’s extra credit and not the norm, especially once the weights get heavy. A two-handed pistol grip press is just fine.
- Lock out the elbow, and pull the loaded shoulder into its socket.
- Bend the knee on the side of the body that’s holding the kettlebell.
- Place the opposite arm on the floor approximately 45 degrees from the body.
- Take a deep breath and hold it.
- Drive from the foot on the working side, roll up onto your elbow, and exhale. Once you’re stable at the elbow, roll up onto your hand.
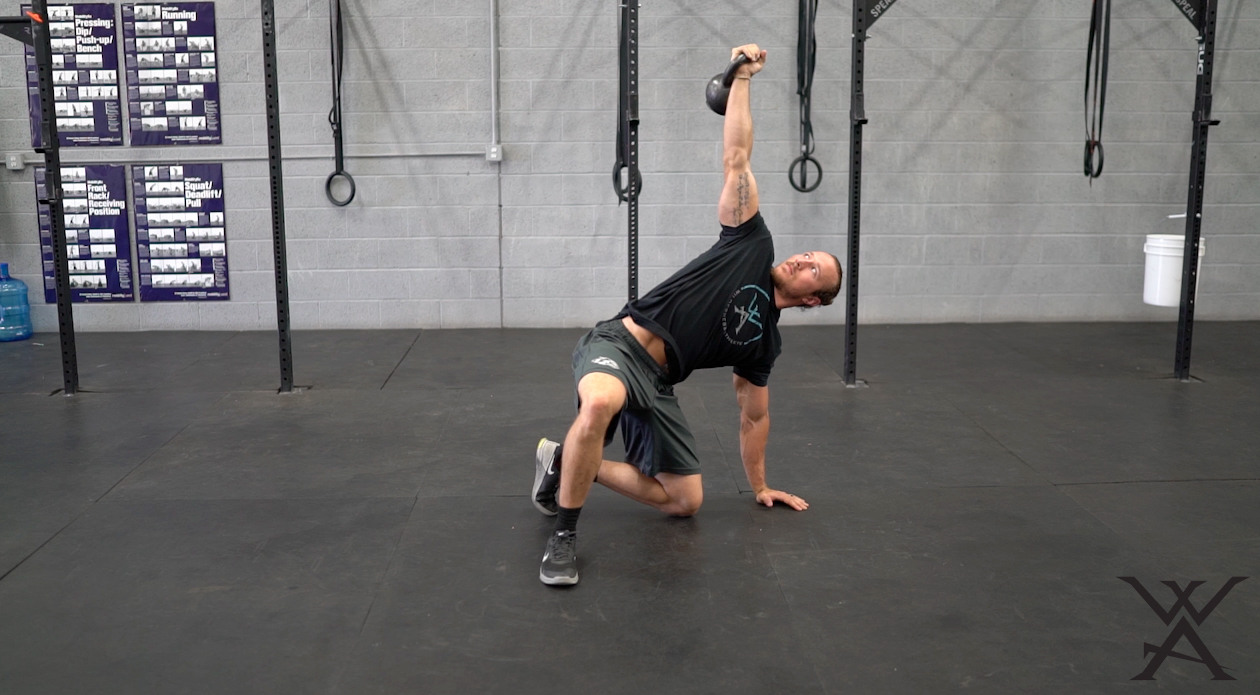
4. Lift Your Hips
- Squeeze your glutes and lift your hips off the ground high enough to be able to move your outstretched leg under your body. You’ll support yourself on one arm, the heel of the straight leg, and the surface of your flat foot, like a tripod.
- Keep your arm extended totally vertical. When the weights get heavy, you’ll know why.
5. Sweep Your Leg And Lunge
- Take your straight leg and pull or sweep it under your body, placing it next to and behind the hand on the floor.
- You’ll end up in a position that makes your legs appear to be 90 degrees from each other. One knee will be pointing straight ahead, and the other should point directly at your hand on the floor.
- Try to keep looking up at the kettlebell in your hand to help maintain balance.
- Take your support hand off the floor and move your body upright, keeping the kettlebell overhead. At this point, shift your gaze so you are looking straight ahead.
- “Windshield wiper” the leg that’s on the ground so that both legs are now parallel to each other, in a lunge position.
- Drive from your back foot, through your hips, and into your front foot, standing up from the lunge. Keep looking forward!
- While still looking forward, step back into the lunge so that your knee is on the floor.
- “Windshield wiper” the back leg into a perpendicular position from the front leg.
- Fold into your hips and place your hand just in front of the knee on the floor.
- Stick your leg straight out in front of you and put your butt on the floor.
- Roll down to your elbow, and then down onto your shoulders and back.
- Lower the kettlebell with two hands to your stomach, then roll to your side and place the weight on the floor.
