HIIT WORKOUT
It’s no secret, we live in a world full of instant gratification seekers, and when it comes to fitness there is no exception. We set goals and want to achieve them yesterday – which is the very thought that sparked this workout.
High Intensity Interval Training (HIIT) is known to be one of the most effective ways to burn calories, tap into fat stores, improve your cardiovascular health, and build your muscular endurance. Sounds great, right? Let’s get to it!
THE WORKOUT
Warm Up
Always begin every workout with an adequate and suitable warm up. This means getting the body temperature up, muscles engaged and begin testing out range of motion. Spending some time on a foam roller, doing some light stretching and joint mobility work is a great start. Also, add in 5-10 minutes of light cardio- walking, jogging, climbing stairs, biking, etc.
RX for blasting calories and shedding some extra pounds – 20 seconds work load, followed by 20 seconds of rest, with rest for 60 seconds between each round. Total of 20-25 minutes.
RX for improving muscular endurance and stamina – 20 seconds work load, followed by 10 seconds of rest, with 30 seconds of rest between each round. Total of 30-40+ minutes depending on your current fitness level.
Find a stopwatch or use your phone, there are some great apps for this, and set it to your desired time target (the recommendation is 20 seconds). You will then begin your first movement.
The Movements
- Shuttle Run – the distance here is not as important as the intensity that you run. Think high intensity, and remember this may change as you progress through each round.
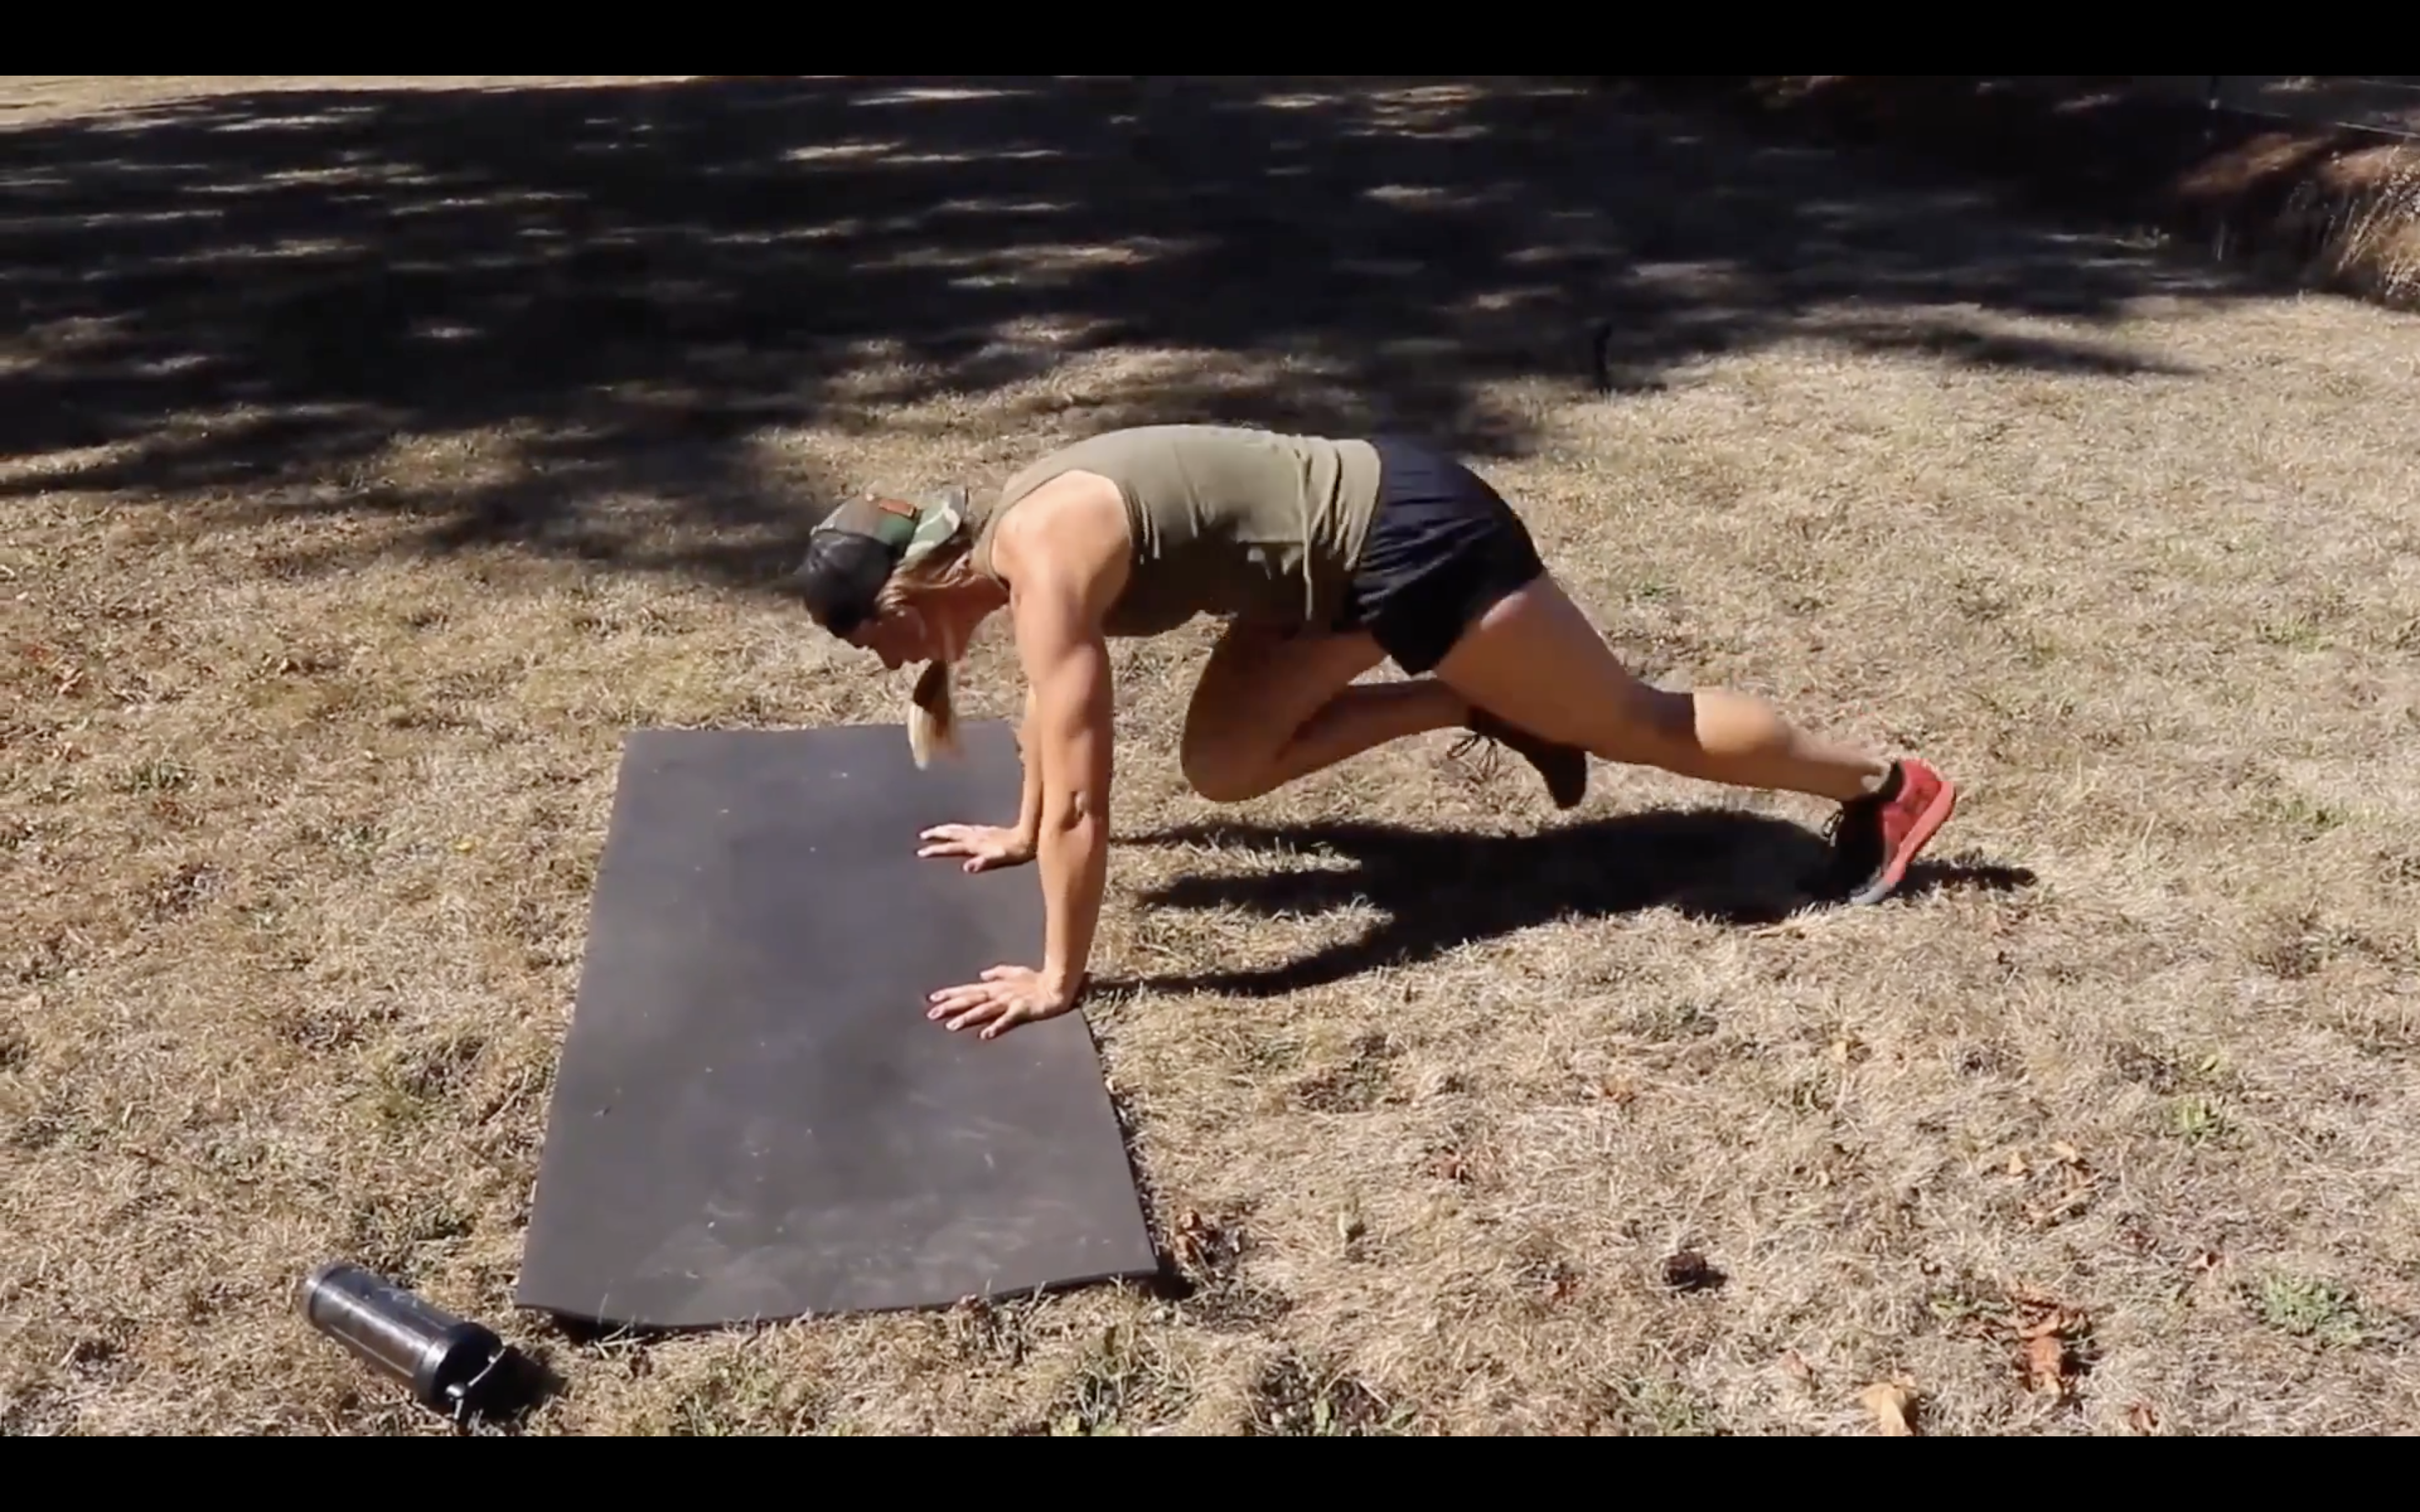
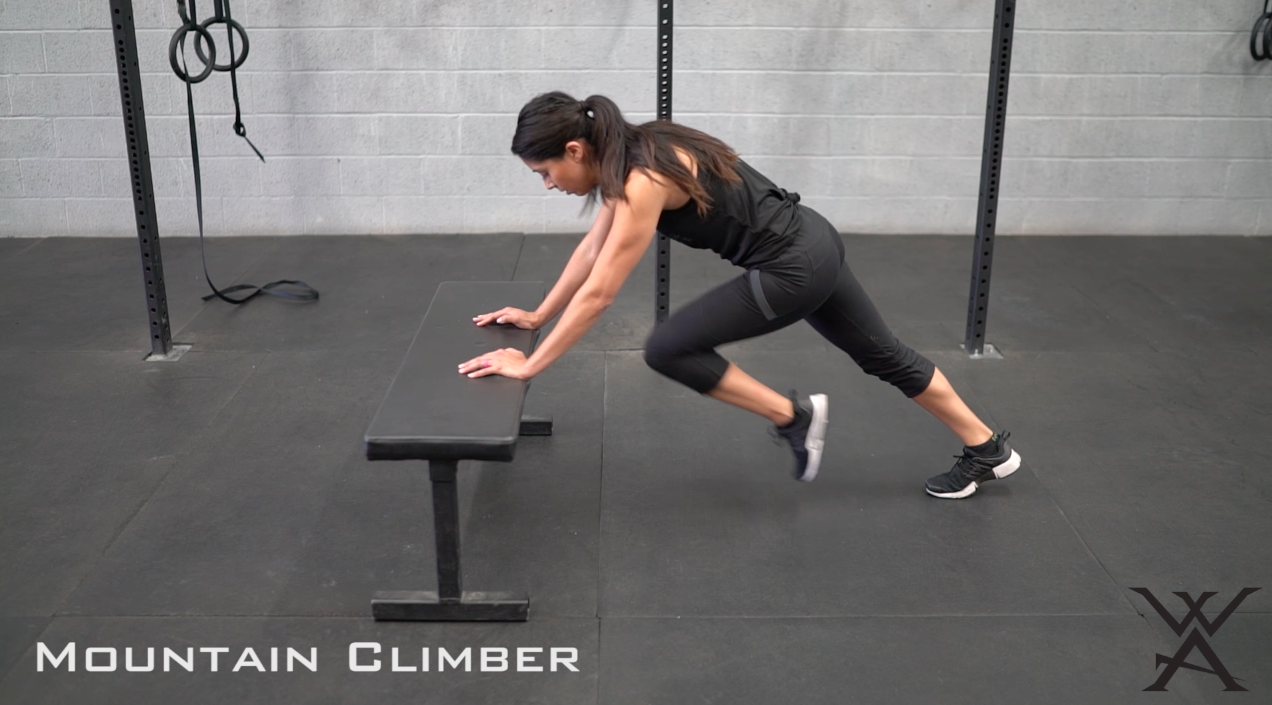
- Mountain Climbers – plant your hands firmly on the ground, and engage your core. You will bring your knee in toward your elbow (same side), continuing to keep your abs turned on, and your upper body stable. Quickly return your leg back to the starting position and switch sides.
- Push Ups – these can be done from your knees or toes depending on your fitness level. For correct form think about creating an arrow with your body – your elbows should be slightly behind your chest. To maintain proper spinal alignment keep your eyes forward and not down, or at your toes.
- Lunges – begin by standing chest out, shoulders back and core tight. Then step one foot back and gently bring your back knee straight down toward the ground. Return to standing by pushing through the front leg, maintaining good posture and pressing through the back half of the front foot. Then repeat on the opposite side.
*Pro-Tip: to make this more of a challenge do all lunges on one side before you switch to the other. Note, this will add an extra 20 second round – you’ve got this! - Burpees – from standing bring your hands down to the ground, jump your feedback into a plank, perform a push-up (or simply lower your chest to the ground), push back to plank, jump your feet in, just wider than your hands, and finish the movement with a jump. Repeat.
*Pro-Tip: To modify bring your hands down to the ground, walk your feet back one at a time to plank position, then walk your feet back up, and return to standing. - Crunches – we will do these crunches with your legs elevated to 90°. Softly cradle your head in your hands being very careful not to pull on the head and neck. Pull your abdominals down tight and crunch up bringing your elbows toward your knees.
- Squats – begin with your feet just wider than your hips and your toes slightly turned out. Squat down maintaining good posture, and return to starting position by pressing through your heels, engaging your legs and glutes.
*Pro-Tip: to add intensity you can replace traditional squats with squat jumps using the same form but adding a jump to the top. - Planks – place your hands down on the ground with your hands directly below your shoulders. Your toes will be under your ankles and your core will be pulled in tight to your spine. Keep a straight line from your head to your feet.
*Pro-Tip: be sure not to let your lower back and hips sag here. Think about engaging your glutes and rolling your hips back (posterior tilt). If needed perform the plank from your knees.
Now you have the tools and it’s time to put it all together. Follow the RX guidelines above to knock this one out of the park and get a few steps closer to your goals.

